
Initial Setup
After installation, complete these steps before business users begin working in EntryLayer.
When to use this page
Section titled “When to use this page”Use this page after the Native App is installed and reachable, but before you create production projects or invite broader teams.
Setup goals
Section titled “Setup goals”- let the right Snowflake roles open the app
- give at least one person admin control inside EntryLayer
- enable Cortex-backed form generation
- grant caller-rights access to Snowflake source metadata and rows
- verify setup from the app UI before creating the first source-connected project
1. Grant a Snowflake role access to the app
Section titled “1. Grant a Snowflake role access to the app”Grant the customer-facing application role to the Snowflake role your users already run with:
GRANT APPLICATION ROLE ENTRYLAYER.ENTRYLAYER_USER TO ROLE <your_role>;ENTRYLAYER_USER is the supported app-access grant. It allows members of <your_role> to open the installed app and reach its web endpoints. It does not grant access to customer-owned source databases.
This is the basic “can open the app” grant. It is not the same thing as submission access and it is not the same thing as direct SQL admin access.
2. Grant direct SQL admin access to a small Snowflake role
Section titled “2. Grant direct SQL admin access to a small Snowflake role”Grant the SQL admin role only to the Snowflake role that should run bootstrap or recovery SQL:
GRANT APPLICATION ROLE ENTRYLAYER.ENTRYLAYER_ADMIN TO ROLE <your_admin_role>;Use ENTRYLAYER_ADMIN for bootstrap and recovery. Do not grant it to every end user.
3. Enable Cortex permission
Section titled “3. Enable Cortex permission”In Snowsight, open the installed EntryLayer app Permissions tab and enable the SNOWFLAKE.CORTEX_USER database role permission.
This enables Snowflake Cortex-backed form generation inside the installed app. No additional SQL grant on the SNOWFLAKE database is part of this setup.
4. Assign the first admin seat
Section titled “4. Assign the first admin seat”Give yourself or another operator an admin seat:
CALL ENTRYLAYER.API.SET_USER_SEAT('YOUR_USERNAME', 'admin');Useful follow-up commands:
CALL ENTRYLAYER.API.SET_USER_SEAT('JANE_DOE', 'build');CALL ENTRYLAYER.API.REVOKE_USER_SEAT('CONTRACTOR_1');CALL ENTRYLAYER.API.LIST_USERS();Important notes:
- usernames are normalized to uppercase internally
- if the user has not opened the app yet, EntryLayer creates the account and membership row automatically
- day-to-day admin work should happen in the app UI, not through repeated direct SQL
This is the step that turns a Snowflake user into an actual EntryLayer administrator inside the product.
5. Grant caller rights on your data
Section titled “5. Grant caller rights on your data”For each database EntryLayer should browse or query:
GRANT CALLER USAGE ON DATABASE MY_DATABASE TO APPLICATION ENTRYLAYER;GRANT INHERITED CALLER USAGE ON ALL SCHEMAS IN DATABASE MY_DATABASE TO APPLICATION ENTRYLAYER;GRANT INHERITED CALLER REFERENCES, SELECT ON ALL TABLES IN DATABASE MY_DATABASE TO APPLICATION ENTRYLAYER;GRANT INHERITED CALLER REFERENCES, SELECT ON ALL VIEWS IN DATABASE MY_DATABASE TO APPLICATION ENTRYLAYER;GRANT INHERITED CALLER REFERENCES, SELECT ON ALL SEMANTIC VIEWS IN DATABASE MY_DATABASE TO APPLICATION ENTRYLAYER;These grants do not create new privileges for your users. They only allow EntryLayer to use privileges the signed-in user already has.
EntryLayer uses its managed warehouse for caller-backed source queries. There is no end-user caller warehouse setup step.
This is what lets:
- the Object Explorer show granted source objects
- project queues reflect user-specific Snowflake access
- masking and row-access policies keep applying inside EntryLayer
6. Launch and verify
Section titled “6. Launch and verify”After these grants:
- Launch the app from Snowsight.
- Confirm the admin user can open Org Settings.
- Confirm Members & Licenses shows the expected
seat_type. - Open Data Access Setup and review Snowflake Access Diagnostics.
- Confirm the Object Explorer can see at least one granted database.
Useful checks:
CALL ENTRYLAYER.API.LIST_USERS();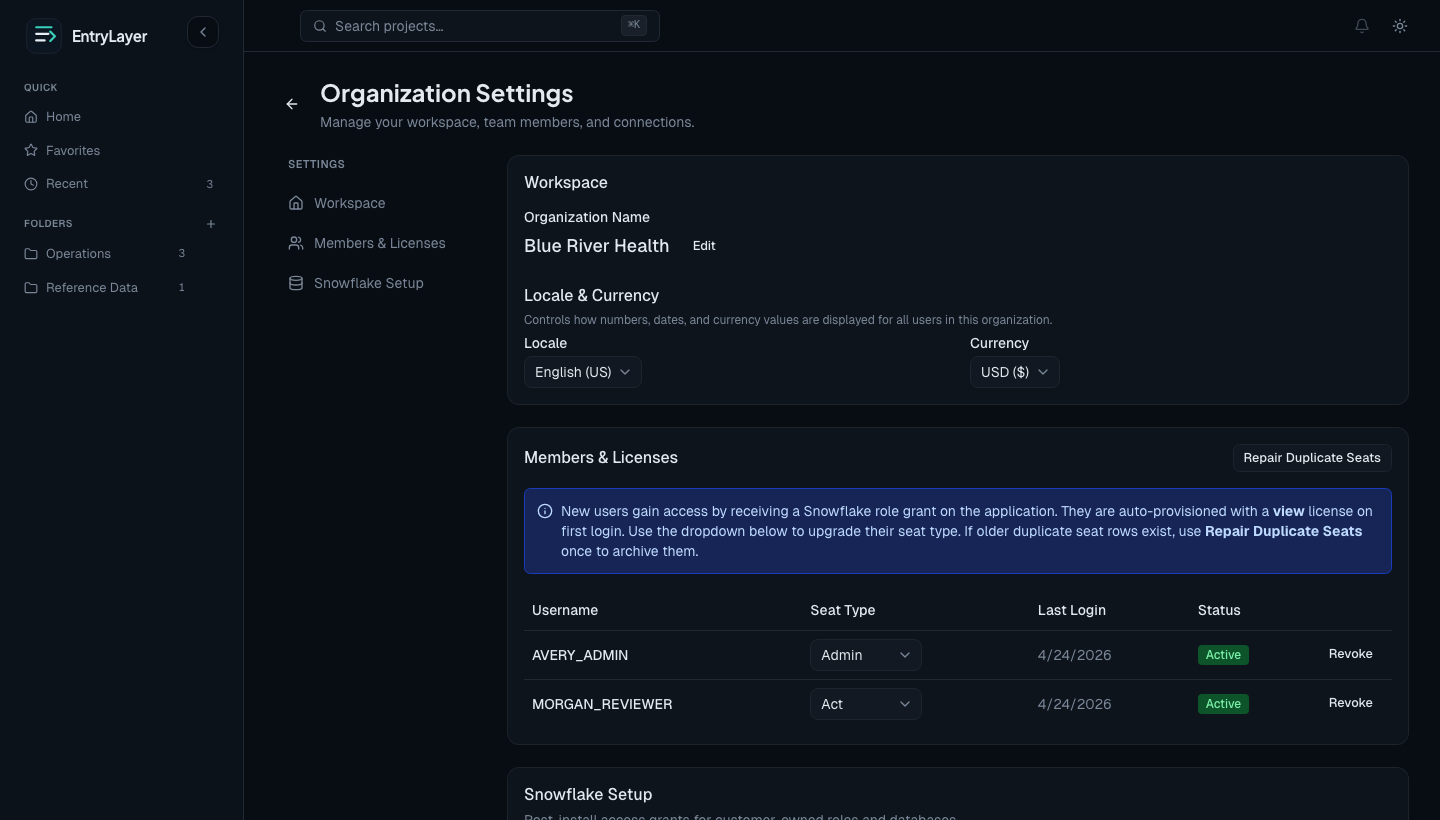
If setup does not verify
Section titled “If setup does not verify”Use the app UI first:
- Org Settings → Members & Licenses for seat state
- Org Settings → Data Access Setup for caller-rights diagnostics
- Snowflake Access Diagnostics for source object visibility
If the app itself is not reachable, use the Admin Guide for operational checks and service-log troubleshooting.
Shared and imported databases
Section titled “Shared and imported databases”Shared and imported databases do not support caller grants.
Because EntryLayer depends on Restricted Caller Rights for per-user source reads, shared and imported database sources are blocked by default in the Marketplace posture.
For those sources:
- EntryLayer does not silently fall back to service-level access
- per-user Snowflake RBAC, row access, and masking cannot be preserved through caller grants
- admins should use consumer-owned tables or views for source-backed projects
Pull data into your own tables
Section titled “Pull data into your own tables”EntryLayer no longer uses direct push/write-back into customer-owned tables as the supported product flow.
Use the pull table function instead:
CREATE OR REPLACE TABLE MY_DB.PUBLIC.PROJECT_PULL ASSELECT *FROM TABLE(ENTRYLAYER.API.EXTRACT_PROJECT_SUBMISSIONS(<project_id>));Next step
Section titled “Next step”Continue to Your First Project.